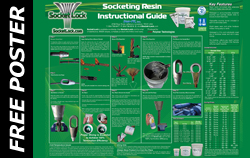
 Wirop Americas is committed to providing the best possible product solutions, outstanding customer support, detailed information and technical resources. We would like to provide your facility with a socketing procedure poster to help remind you and your coworkers of safe socketing practices, and guidelines to help promote a safer working environment. To obtain your free socketing procedure poster please write or call Wirop Americas HERE.
Step 1 - Measure Socket Bowl
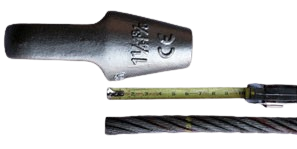
To determine where to apply seizing wire, measure socket from bottom of socket to the top of the bowl.
The end of the rope should be long enough so the ends of the wires after being broomed will be at or slightly below the top of the socket bowl.
Step 2 - Slide Socket onto Rope

Step 3 - Apply Seizing Wire at Base of Socket
Apply the seizing wire one (1) socket bowl length from the rope end and continue to apply, working away from the rope end. The seizing length must be at least two (2) rope diameters long. Additional information is available from the Wire Rope Users Manual, Wire Rope Manufacturer’s Catalogues or National Standards.
Plastic coated, plastic filled wire ropes and fiber cored ropes must have all plastic material and nonmetallic materials removed from within the broomed area.

NOTE: Only use soft annealed iron wire for seizing wire.
Step 4 - Broom Wire Rope End
|
Using a marlin spike, begin to open the strands. |
Using a short piece of pipe, bend each strand open to a 60 degree included angle. |
Open strands evenly as shown here. Should the rope have a plastic coated core, remove all plastic coating. For fiber core ropes, cut out the fiber core. |

Keys to Making a Good Socket Pour – Properly Broom Rope End
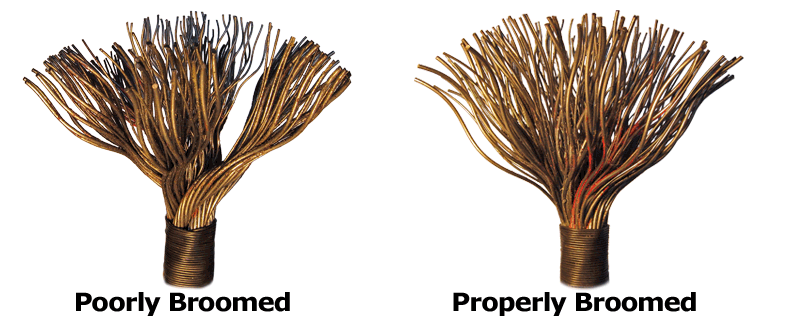
As tension is applied to a finished socket assembly, friction between the hardened resin and wires must exceed the friction between the outside of the resin cone and inner socket wall preventing the wires from pulling out, and allowing for the resin cone to seat and compress. The compression that is then generated between the wires and resin cone becomes stronger than the wire rope itself. For proper friction to occur, it is very important that the rope end be properly broomed and opened all the way down to the seizing to allow resin to reach the bottom of the socket bowl. See illustration below.
Clean Wires Throughly
Thoroughly cleaned wires provide greater adhesion; therefore, providing more friction that helps enable proper seating of the resin cone and generating compression to provide the required strength of the assembly.
Align Vertically When Pouring Resin
A socket assembly that was properly aligned during the pouring of the socket will allow for even distribution of forces on the wire and resin cone; therefore, possessing strength greater than the wire rope. If the rope is not properly aligned while pouring of the resin into the socket, the rope will be set at an angle. Testing has shown that when this occurs, the rope will break at the base of the socket below the catalog breaking strength of the rope.
Step 5 - Clean Wire Rope End
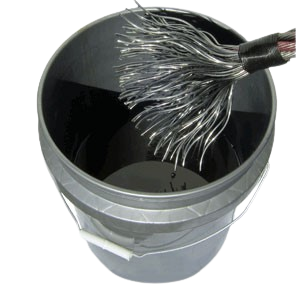
Swish the broomed-out rope end in a solvent and make sure that the wires are clean from the very bottom of the broom up to the seizing band. After cleaning, place the broomed-out rope end pointing downward. Allowing it to remain inverted until all solvent has evaporated and the wires are dry. Solvent should never be permitted to remain on the rope or on the serving band since it will run down the wires when the rope is turned upright.
NOTE: Clean solvent is recommended to achieve best results.
Step 6 - Pull Broom Into Socket Bowl

Pull the socket up over the rope broom. Make sure the rope wires are uniformly spaced in the socket bowl, with the wire ends slightly below the top edge of the bowl and the axis of the rope and the socket are aligned.
The top of the seizing should be even with the bottom of the socket. Be sure not to allow any broomed wire to extend below the base of the socket.
Step 7 - Seal Bottom of Socket
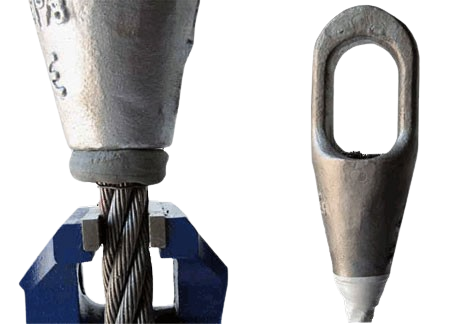
Wrap the bottom of the socket with socketing putty, being sure to press the putty into the valleys between the strands.
To provide a greater seal, wrap electrical tape over the socketing putty.
Step 8 - Mix Resin

Knead resin pouch for approximately 30 seconds prior to cutting open to mix the resin/silica thoroughly.
Cut open the resin pouch and squeeze contents into mixing container provided.
Cut open the hardener pouch and squeeze contents into resin.
With a mixing paddle, thoroughly mix resin and hardener until color is uniform, then continue mixing for 30 seconds to ensure complete mixing.
Proper Mixing is Essential to Achieve 100% Termination Efficiency
Step 9 - Pour Resin Mixture Into Socket
After mixing resin and hardener, immediately prepare to pour it into the socket.
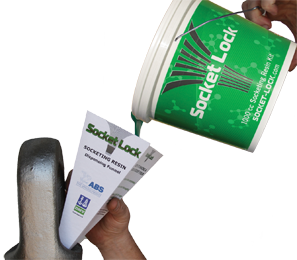
Position the provided “Fast Funnel” so that the resin will discharge out of the funnel into the socket bowl along the socket wall. This will help the resin reach the bottom of the bowl and reduce chance of trapping air.
Fill to the top edge of the socket bowl. As resin mixture penetrates down into the bowl, it may be required to add more resin to the socket bowl. Never add more resin to the bowl after resin has begun to gel and harden.
Allow resin to firmly gel prior to moving assembly. Prematurely moving the assembly could damage the resin before it hardens; therefore, reducing the efficiency of the termination. Wait 10 to 15 minutes after the resin has gelled before moving the assembly. Please refer to Temperatures and Times on this web page for approximate gel times.
When recommended procedures are followed and resin has been allowed to fully cure, socket assemblies prepared with Socket Lock resin will attain 100% Termination Efficiency.
Step 10 - Re-Lubricate Wire Rope
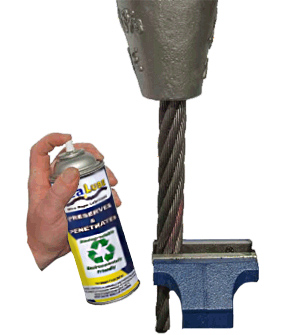
After the resin has cured, re-lubricate the wire rope to replace any lubricant that may have been removed during the cleaning process.
Step 11 - Proof Test Assembly (Recommended)
It is recommended to proof load the assembly to twice the safe working load prior to putting the assembly into service per ASME B30.9.
Free Poster
 Wirop Americas is committed to providing the best possible product solutions, outstanding customer support, detailed information and technical resources. We would like to provide your facility with a socketing procedure poster to help remind you and your coworkers of safe socketing practices, and guidelines to help promote a safer working environment. To obtain your free socketing procedure poster please write or call Wirop Americas HERE.
